Sandustry Beginner Guide: Your First Hour, From Zero to Your First Gold Line
Sandustry drops you on an unexplored planet with a digging tool and one promise: every pixel is a resource VERIFIED. This guide walks you through the first hour — from your first shovel of sand to a gold line that runs itself — so you spend your early, precious gold on the right research instead of expensive mistakes.
Try before you buy: There's a free Demo on Steam that covers the core loop VERIFIED. Everything in this guide applies to both the Demo and EA builds.
Before You Start
Sandustry is a single-player factory-automation sandbox. The EA build is on Steam, GOG, Microsoft Store, and PC Game Pass VERIFIED. The world is procedurally generated and fully destructible — terrain, resources, and even your own buildings can be dug up, moved, or melted.
- No fail state for building. Players confirm that placing and demolishing buildings is free COMMUNITY — if a layout is wrong, tear it down; the only cost is time.
- Physics is the gameplay. Sand flows downhill and absorbs water; ice melts into water when heated; water boils into steam that rises and condenses back as rain VERIFIED.
- Gold is the early currency. For the first few hours, almost every important unlock is bought with Gold at the research panel.
The Core Loop
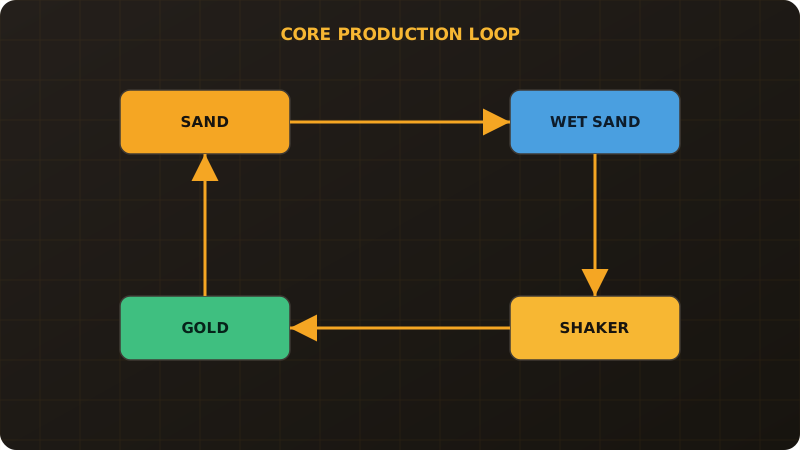
- Dig — mine sand from the surface, find a water source.
- Mix — let sand meet water: 1 sand + 1 water = 2 wet sand COMMUNITY.
- Sift — feed wet sand into a Shaker to produce Gold and residue COMMUNITY.
- Store — route Gold into a Collector so it counts toward research COMMUNITY.
- Unlock — spend gold on research: conveyors, filters, pipes — and only then real automation.
- Dig deep — descend for rarer pixels and the vaults of an ancient civilization VERIFIED.
Your First Hour, Step by Step
Step 1: Break ground and read the terrain (0–10 min)
Dig a wide, shallow pit near spawn and watch how sand collapses and flows. Find water early — your whole economy starts where sand meets water. Don't drain your only lake: sand absorbs surrounding water and can slowly exhaust a finite reservoir VERIFIED.
Step 2: Build your first mixing pool (10–25 min)
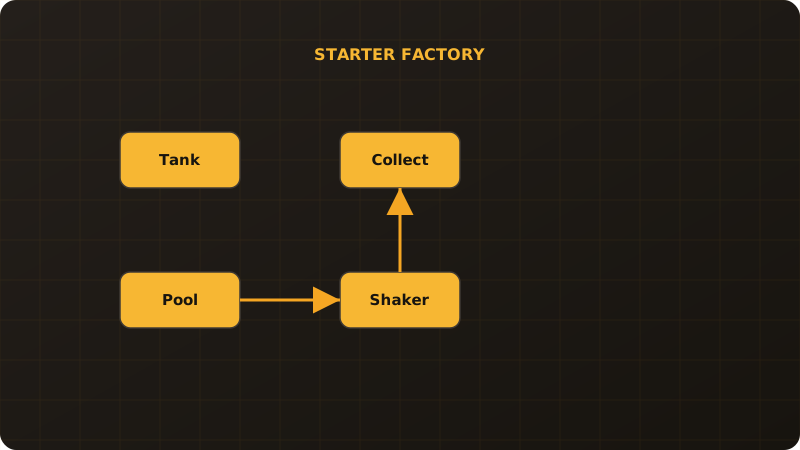
Channel a thin stream into a sand basin. Flooding wastes water and creates chaos; a narrow channel gives you a steady wet-sand supply. Ratios and layout details are in the Gold & Resources guide.
Step 3: Unlock and place a Shaker (25–40 min)
The Shaker is your first research unlock and the heart of the early economy — community testing puts its research-tree cost at 20 gold COMMUNITY. Feed it wet sand, collect the gold, and route the residue away from your work area.
Step 4: Automate your first line (40–60 min)
Once Logistics unlocks, run a conveyor from the mixing pool to the Shaker, then a Collector that banks the gold automatically. Congratulations — you have a factory. Next, see the Automation & Logistics guide.
Controls You Must Know
Community-compiled PC keybindings COMMUNITY — learn these five and your opening speed doubles:
| Key | Function |
|---|---|
| S | Drill down |
| R | Toggle build mode (line / rectangle) |
| X | Demolish a building |
| Shift + drag | Box-select (launcher outlets can use Shift to skip) |
| Space / Esc | Menu |
First Research Priorities
The community-consensus EA research order COMMUNITY: Refinement 1 → Logistics 1 → Filter → Pipes → Tools → Refinement 2 (Slag Press) → Drones. One rule sums it up: buy production and logistics first, toys later. Full node costs are on the Tech Tree & Recipes page.
Don't plan around Demo-era numbers. After the 2026 simulation rewrite some ratios changed; treat any exact figure as a planning estimate and confirm in-game. Misled by an old tutorial? See EA vs Demo mechanic differences.
Mistakes Beginners Make Most
- Draining the lake. Sand "drinks" — an uncontrolled basin can quietly exhaust your only water before you have pumps.
- Buying tools before logistics. A faster shovel feels good, but a conveyor multiplies every minute after it.
- Letting residue pile up. The Shaker produces waste — route it away early or it buries your own machines. (Sand gets everywhere. VERIFIED)
- Fighting physics instead of using it. Thick ice wall in the way? A flamethrower works — but diverting lava does too VERIFIED.
- Staying on the surface. The surface pays the bills; the ancient vaults hold the real prizes VERIFIED. See Ancient Artifacts & Civilization.
Where to Go Next
Sharpen your economy with the Gold & Resources guide; open a second gold line with the Lava & Slag Press guide; decide if it's worth buying with the review; and if launching or lag hits, head to the Fix hub.